
GitHub Enterprise Server
Buildkite can connect to your GitHub Enterprise Server and use the GitHub Status API to update the status of commits in pull requests. This guide describes the setup for self-hosted GitHub Enterprise Server. GitHub Enterprise Cloud users should refer to GitHub.
Buildkite plan availability and GitHub Enterprise version
GitHub Enterprise is only available to Buildkite customers on Pro or Enterprise plans.
This guide is based on GitHub Enterprise version 2.16.3. Earlier or later versions may have different menus and headings for the OAuth app registration. All of the Buildkite settings will remain the same.📘 Accessing private repositories
Connecting your GitHub Enterprise Server to Buildkite configures webhooks and commit statuses. If you use the GitHub App integration with code access enabled and Buildkite-hosted agents, code access is included automatically. Otherwise, you need to configure code access separately. The recommended approach is to store an SSH key as a Buildkite secret and reference it with checkout.ssh_secret in your pipeline YAML. For full setup instructions, see self-hosted agent code access or Buildkite hosted agent code access.
You can connect a GitHub Enterprise Server installation using either an OAuth App or a GitHub App. This guide covers the OAuth App integration first, which Buildkite shows as GitHub Enterprise Server (legacy). The GitHub App integration is newer and currently in private preview. With it, Buildkite creates and manages the app for you and supports optional code access for hosted agents. For proxy and firewall setups, see Firewalled installs.
OAuth App
Step 1: Register Buildkite as an OAuth app
In your GitHub Enterprise organization settings, select OAuth Apps under Developer Settings:
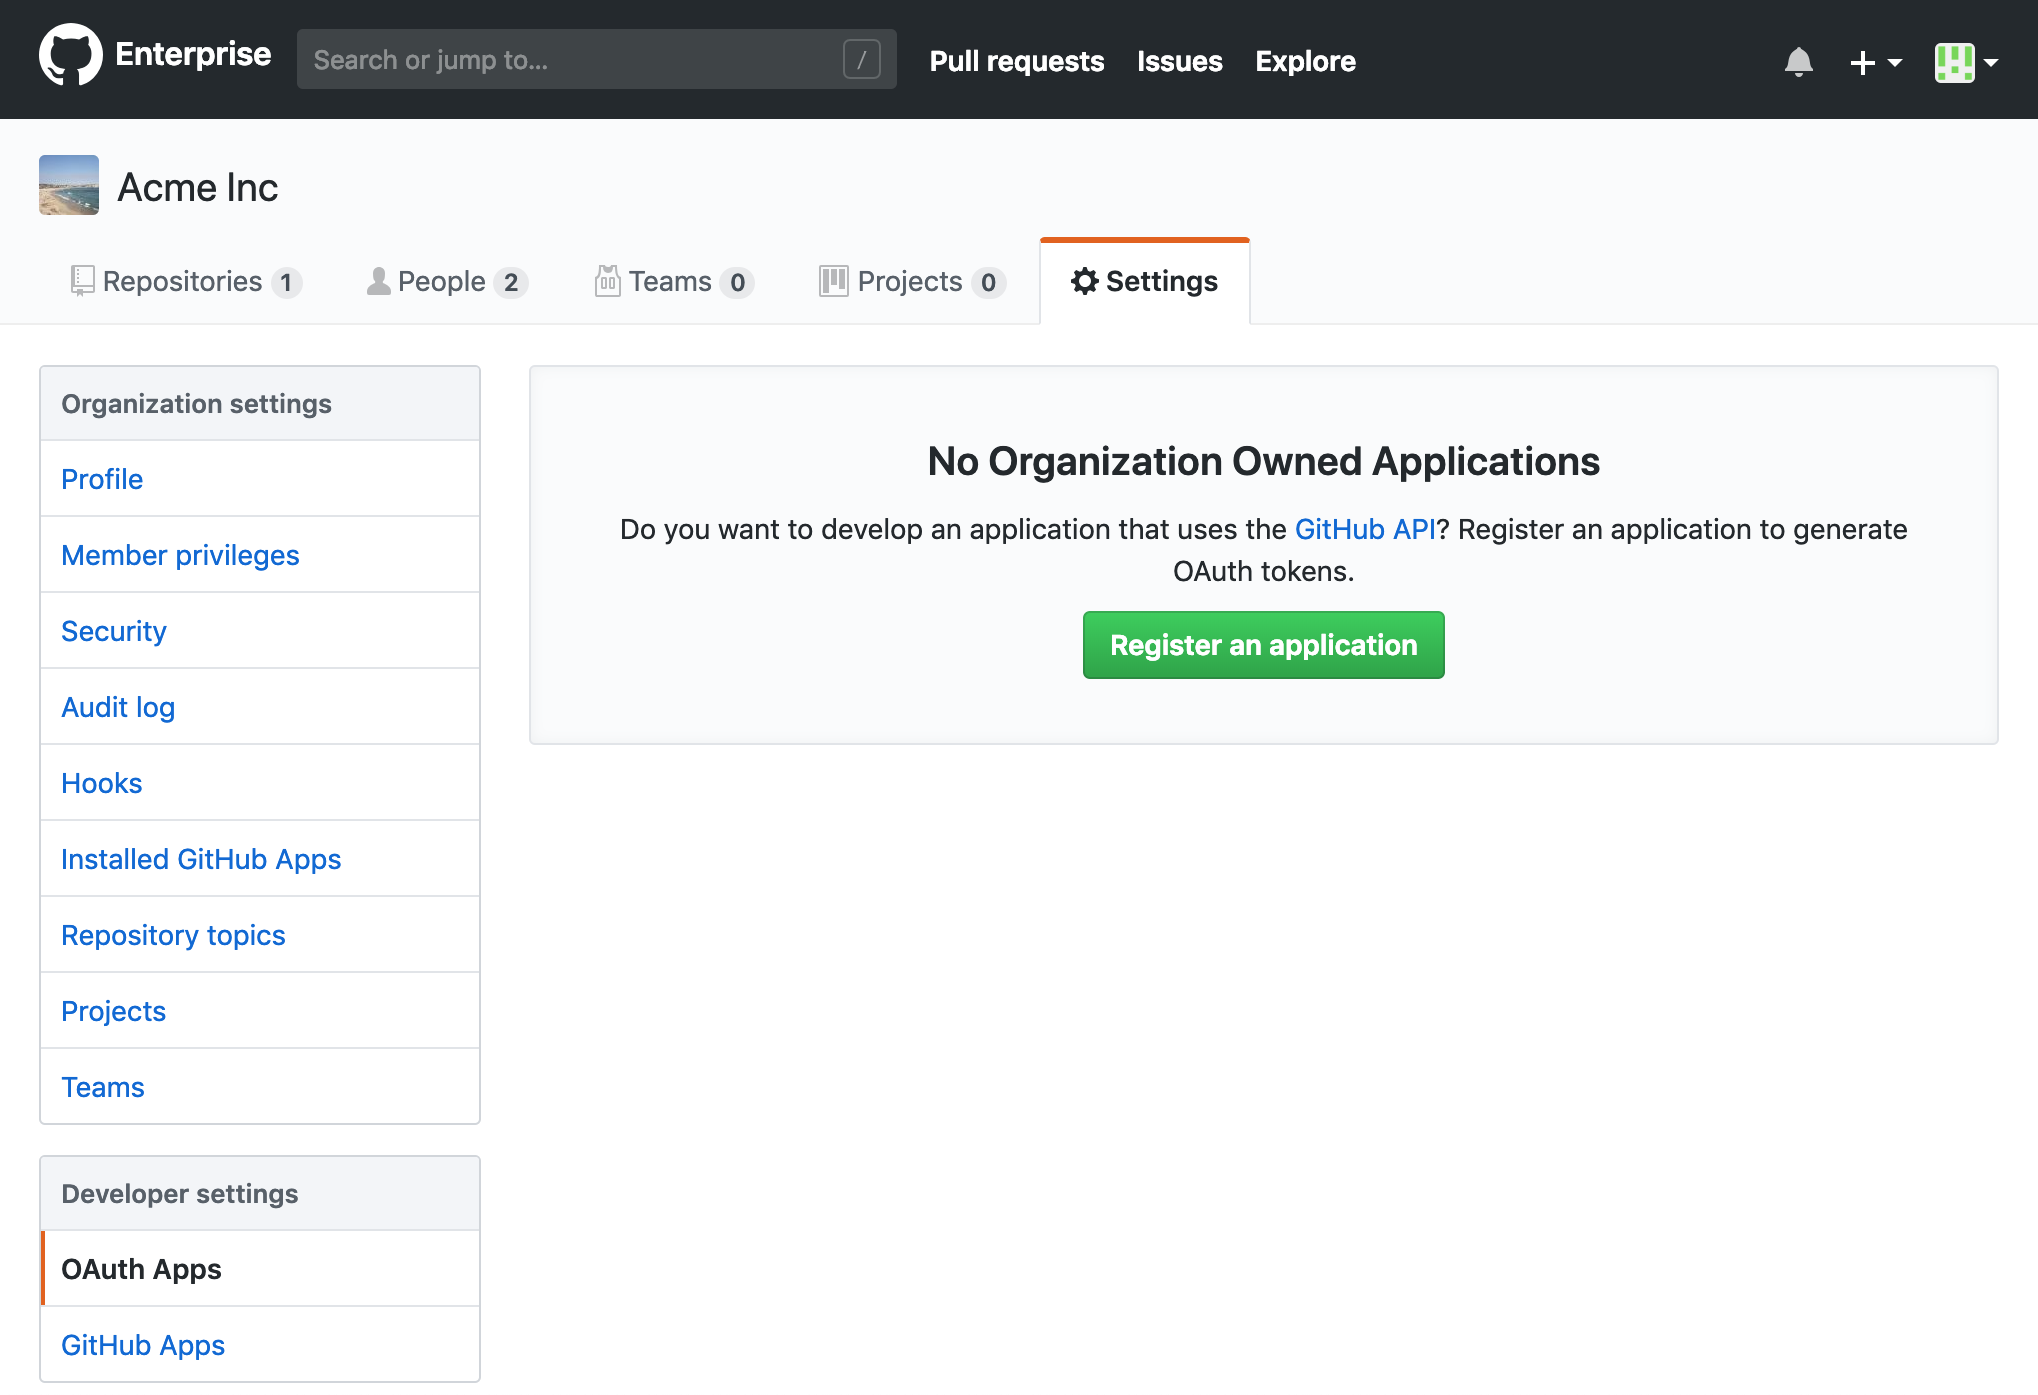
Select Register an application. Fill out the form with the following values:
- Name:
Buildkite - URL:
https://buildkite.com - Callback URL:
https://buildkite.com/user/authorize/github_enterprise/callback
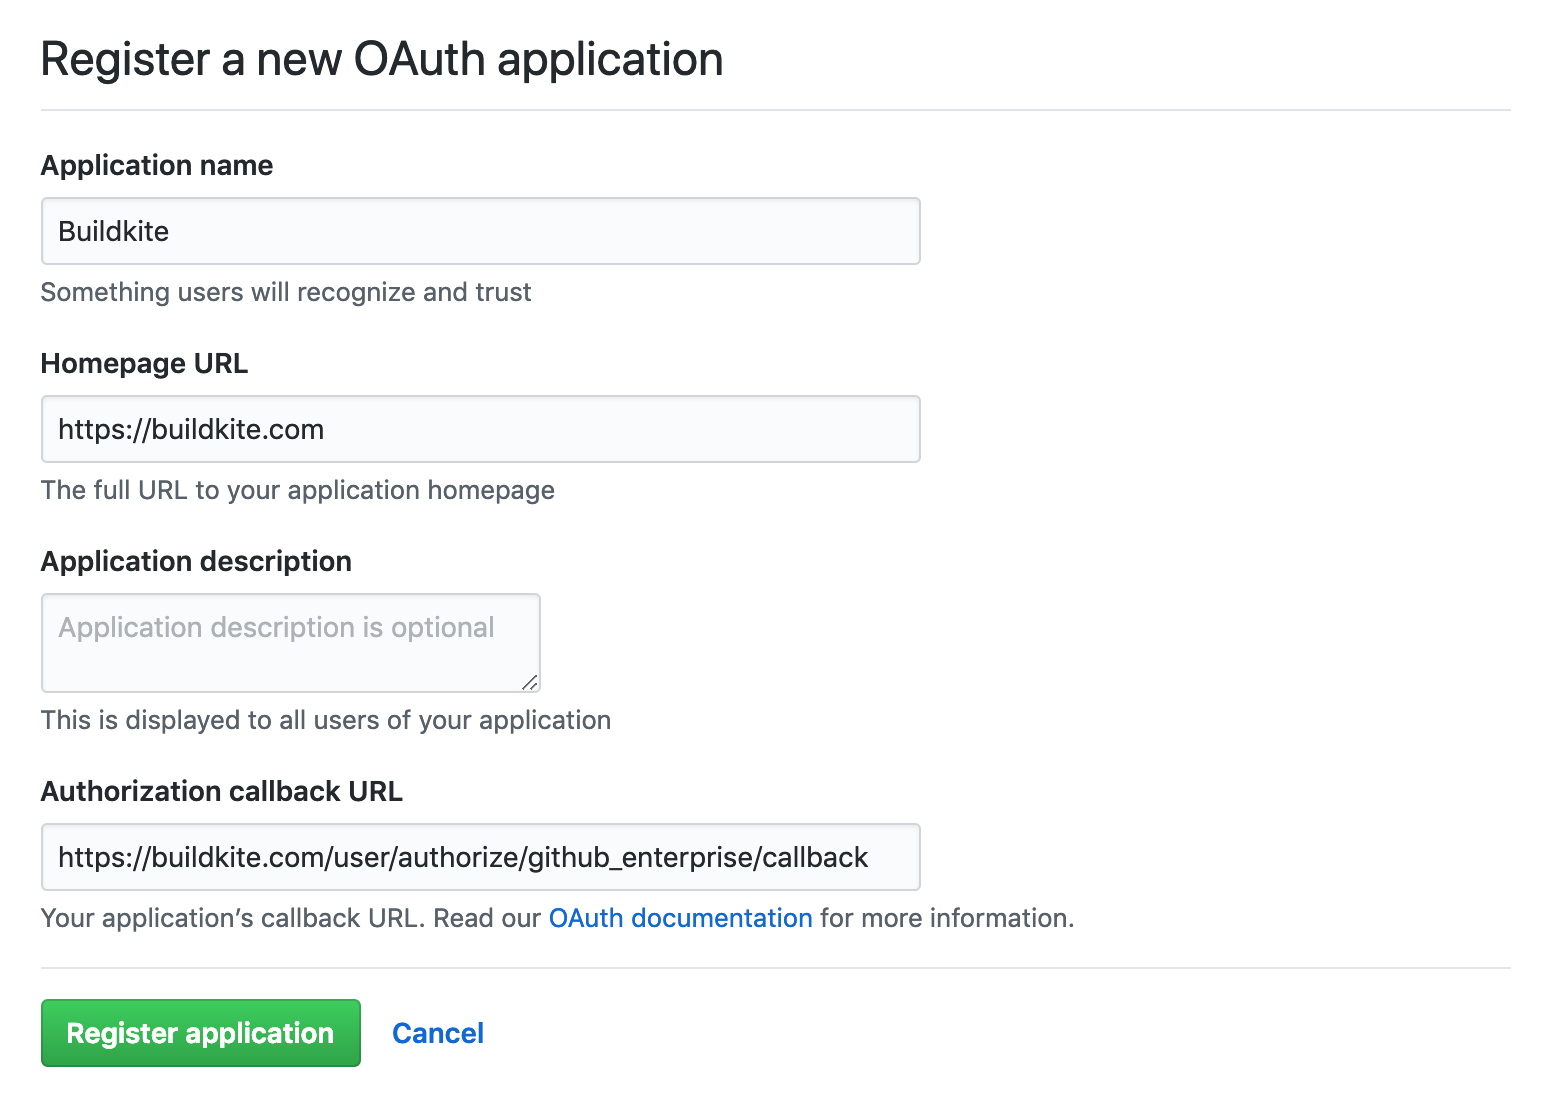
Select Register application at the bottom of the form.
After successfully registering your application, you can optionally add a logo to your app. Here is a pre-cropped image you can use:

Make a note of your Client ID and Client Secret, you will need those to connect your GitHub Enterprise Server with Buildkite in the next step.
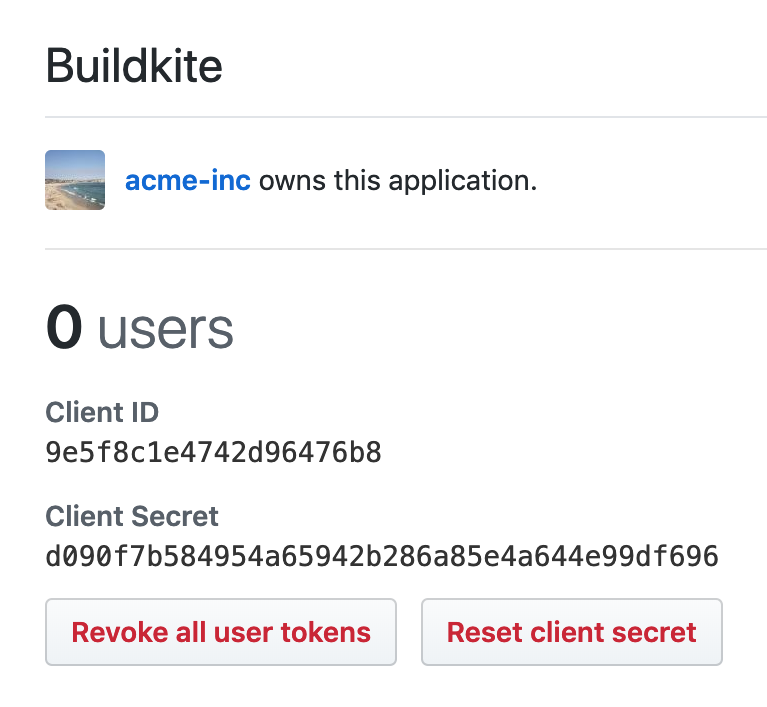
Step 2: Update your Buildkite organization settings
- Open your Buildkite organization's Settings and choose Repository Providers.
- Select GitHub Enterprise Server (legacy).
- Enter your settings:
- The URL and public proxy URL of your GitHub Enterprise Server
- The Client ID and Client Secret from the GitHub OAuth App you created in Step 1
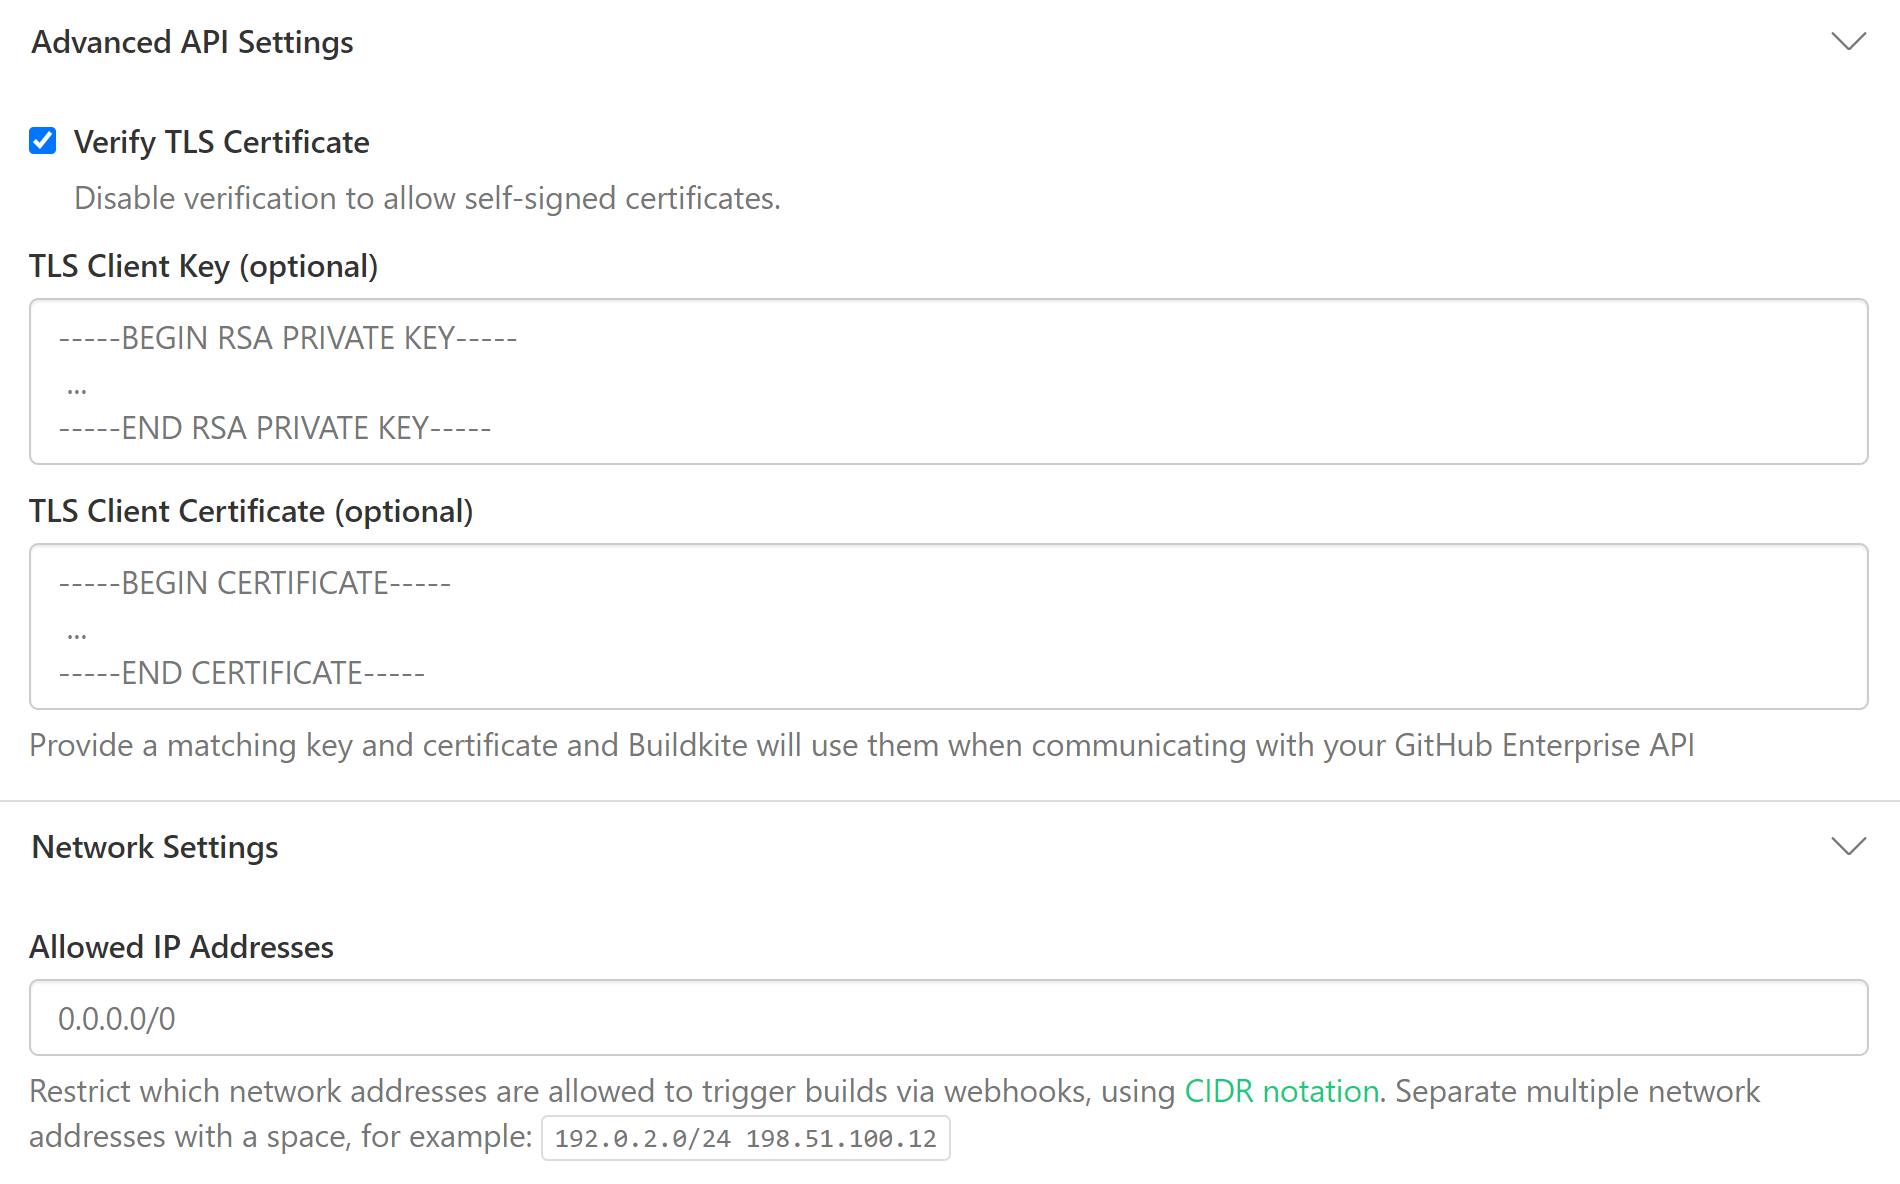
- If you're using self-signed certificates, make sure the Verify TLS Certificate checkbox is not selected.
-
Select Save GitHub Enterprise Settings to save your settings. After saving, the Secret field appears blank. Buildkite has saved it, and will not display it.
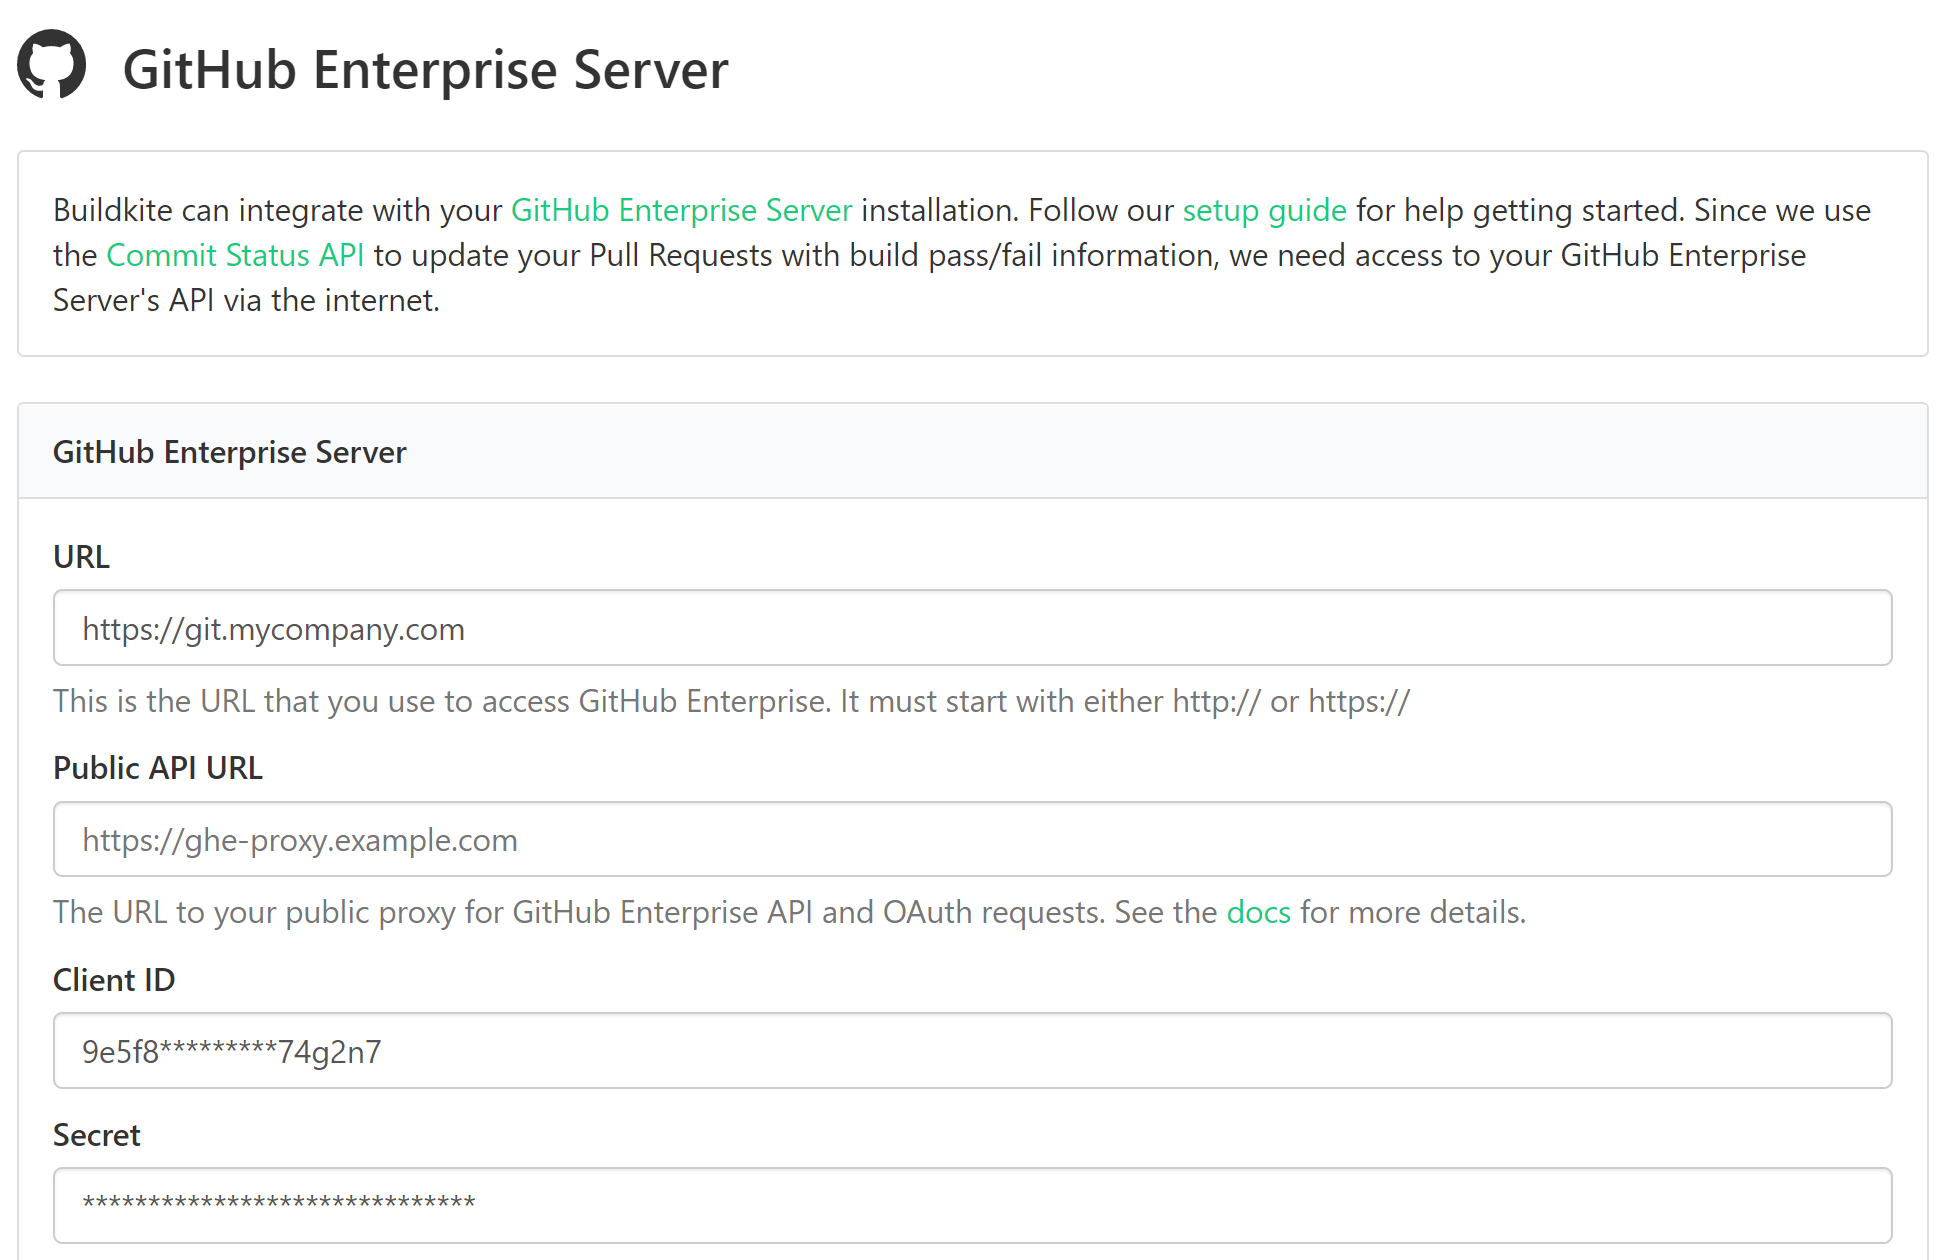
You can optionally supply a TLS certificate pair to be used by Buildkite as a client certificate when contacting your GitHub Enterprise endpoints.
Step 3: Connect your GitHub Enterprise account to Buildkite
For Buildkite to mark commits and pull requests as pass or fail, you need to authorize your GitHub Enterprise user account with Buildkite.
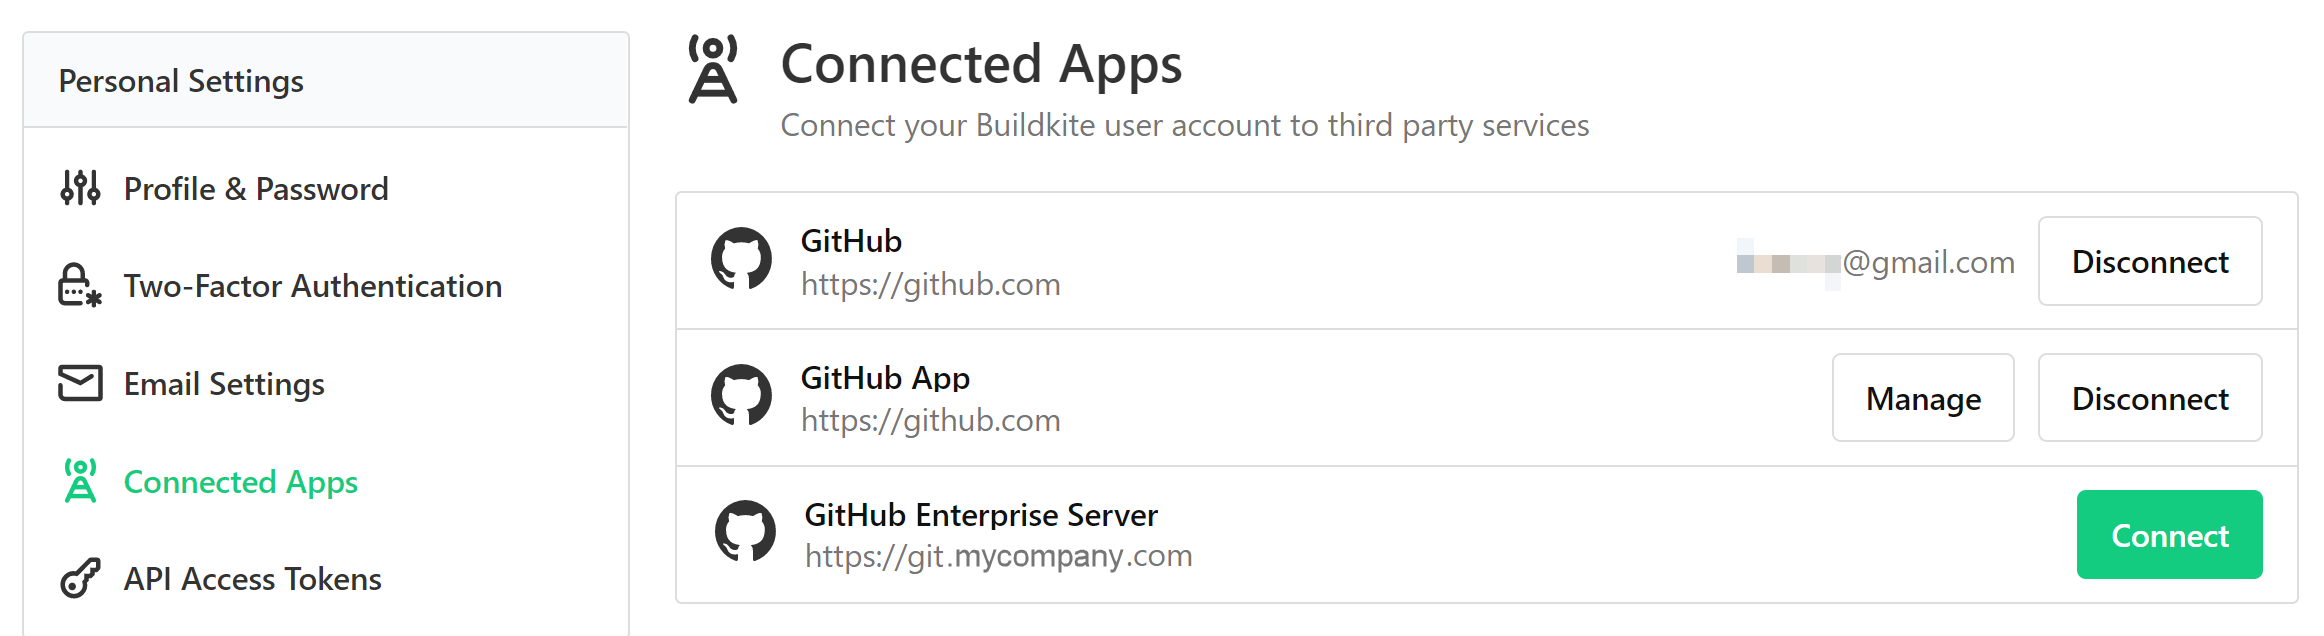
- In your Buildkite Personal Settings, select Connected Apps. Here you'll see your GitHub Enterprise Server along with any other connected apps.
-
Select Connect next to GitHub Enterprise:
-
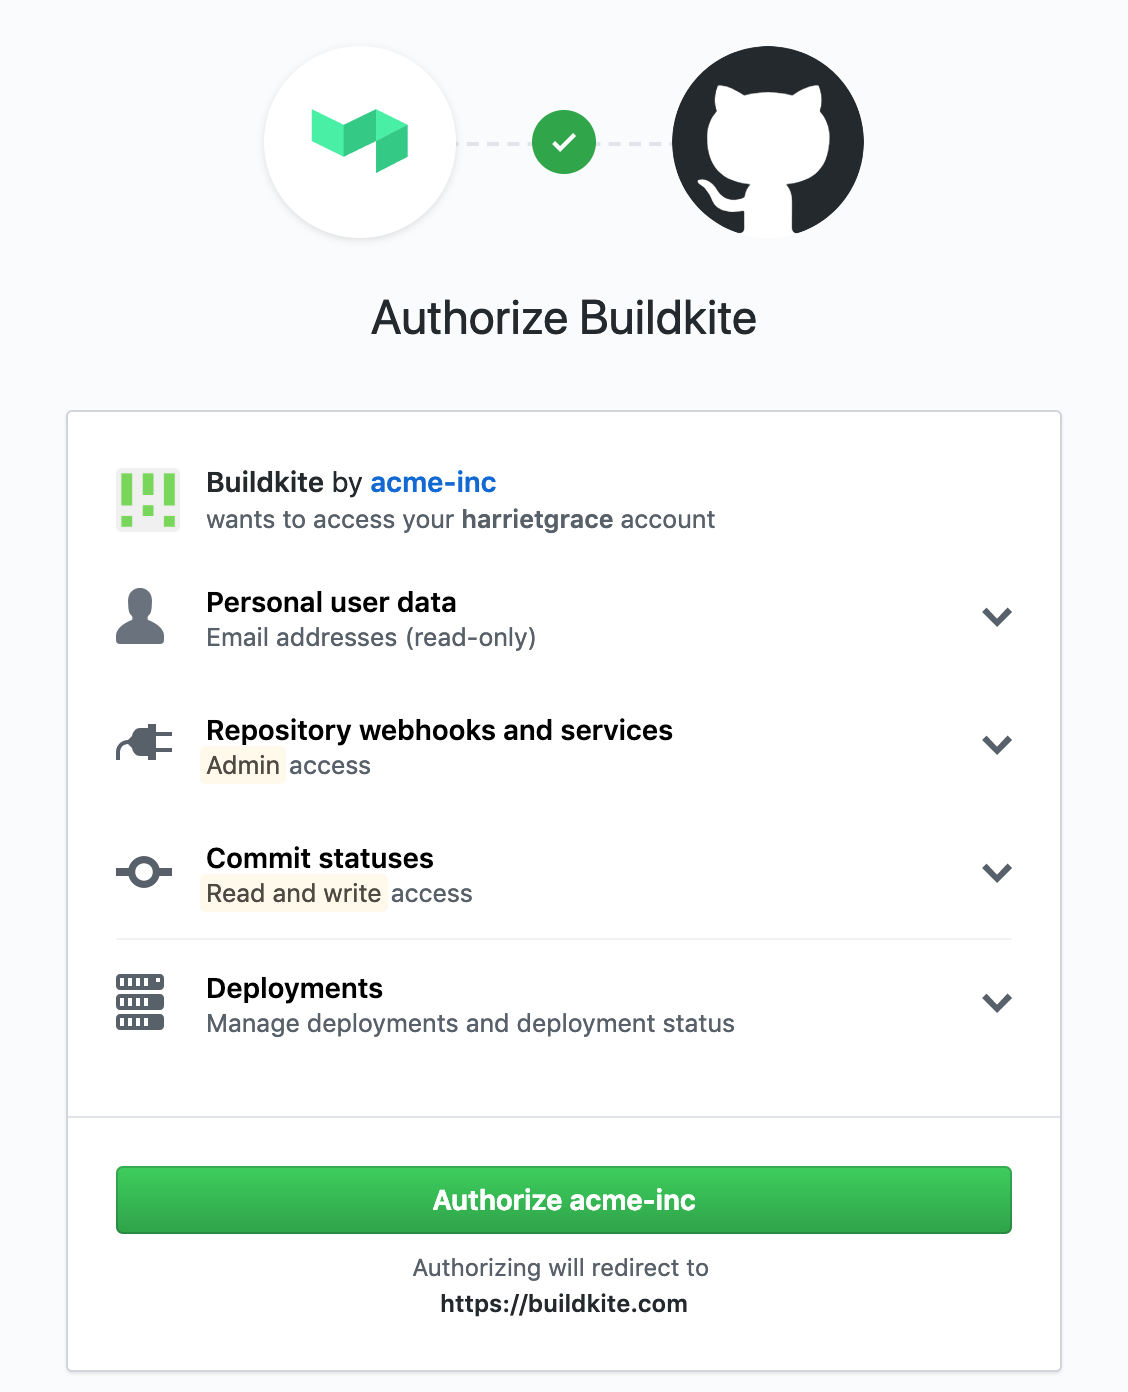
Buildkite redirects you back to your GitHub Enterprise Server, where it asks you to authorize your new Buildkite OAuth app to use your GitHub Enterprise account. Select Authorize to complete your setup:
That's it! Next time you create a pipeline with a repository that's either
https://git.mycompany.com/acme-inc/app.gitorgit@git.mycompany.com:acme-inc/app.git. Buildkite will recognize that it's hosted on your GitHub Enterprise Server, and use your newly created OAuth authorization to update the commit statuses.
Transferring ownership
If you need to leave your current GitHub Enterprise Organization, you need to transfer the OAuth ownership first. Without this, the remaining members of your Buildkite team who are using that GitHub Enterprise Organization for OAuth won't be able to log in.
To correctly transfer the OAuth ownership over your GitHub Enterprise Organization, see GitHub's official documentation for Transferring ownership of an OAuth App and Maintaining ownership continuity for your organization.
GitHub App
The GitHub App integration for GitHub Enterprise Server is currently in private preview. To enable it for your Buildkite organization, contact support@buildkite.com.
With the GitHub App integration, Buildkite creates a GitHub App on your GitHub Enterprise Server that receives webhooks to trigger builds and reports commit statuses back to your repositories and pull requests. You can optionally grant it code access so hosted agents can clone private repositories.
Set up the GitHub App
- Open your Buildkite organization's Settings and choose Repository Providers.
- Select GitHub Enterprise Server, the entry marked New, rather than GitHub Enterprise Server (legacy).
- Enter your settings:
-
URL: the URL of the GitHub Enterprise Server to connect, for example
https://github.example.com. -
GitHub Enterprise Organization: the organization on GitHub Enterprise Server to create the app in. For example, to create the app in
https://github.example.com/acme, enteracme. - Code read access: select this to grant the app read-only repository contents permission. This is required if using hosted agents to clone private repositories, and for the branch, tag, and release webhook events.
- If Buildkite reaches your GitHub Enterprise Server through a proxy, open Advanced API settings and set the Public API URL. See Firewalled installs for the network configuration.
-
URL: the URL of the GitHub Enterprise Server to connect, for example
- Select Create. Buildkite sends you to your GitHub Enterprise Server to create the app from a manifest. This step runs against your GitHub Enterprise Server URL directly, so you need browser access to it.
- On your GitHub Enterprise Server, review the app details and create the app. Your GitHub Enterprise Server will return you to Buildkite, which registers the provider and opens its settings page.
- The provider isn't functional until the app is installed on your GitHub Enterprise Server. On the Buildkite provider settings page, select Install GitHub App to return to your GitHub Enterprise Server, then choose the organizations and repositories the app can access and install it. Your GitHub Enterprise Server returns you to Buildkite, which confirms the installation. Install the app in each GitHub organization you want to use with Buildkite.
Known limitations for additional webhook events
The GitHub App manifest subscribes to the create, delete, and release webhook events. GitHub only delivers these events when the app has contents: read permission, which the manifest includes only when you select Code read access during setup.
This means installations without code access don't receive create, delete, or release events, so the corresponding pipeline settings (branch and tag creation and release triggers) have no effect. The cancel_deleted_branch_builds setting is not affected, because branch deletion is also detected through push events.
Enabling additional webhook events
To enable these events, reinstall the GitHub App with code access enabled. See the GitHub integration docs for details on additional webhook events.
Branch configuration and settings
You can edit the version control provider settings for each pipeline from the pipeline's settings page. Go to Pipelines > your specific pipeline > Settings > your Git service provider.
If you need more control over your pipeline configuration, add a pipeline.yml to your repository. Then you can use conditionals and branch filtering to configure your pipeline.
Firewalled installs
If your GitHub Enterprise Server is behind a firewall, you need to allow Buildkite's IP addresses so Buildkite can reach the GitHub Enterprise Server API to authenticate and update your pull request statuses.
All Buildkite network traffic to your GitHub Enterprise Server comes from a set list of IP addresses. Because these addresses can change, retrieve them from the Meta API endpoint rather than hard-coding them, then configure your network to allow traffic from every address the endpoint returns.
The proxy guidance below depends on which integration you are setting up. The OAuth App and the GitHub App reach GitHub Enterprise Server over different paths.
OAuth App
For additional security, you can put a proxy in front of GitHub Enterprise Server that allows only the API endpoints the OAuth integration requires, then enter the proxy address in the Public API URL field of your Buildkite GitHub Enterprise Server settings. The OAuth integration only calls these paths:
/api/v3/repos/.*/.*/statuses/.*/api/v3/user/api/v3/user/emails/login/oauth
The following is an example NGINX server configuration that proxies these paths:
daemon off;

events {
  worker_connections 1024;
}

http {

  server {
    listen 443 ssl;

    location / {
      # Your own IPs
      allow ...;

      deny all;
    }

    location ~ ^/api/v3/repos/.*/.*/statuses {
      proxy_pass https://ghe.internal:443;

      # Allow for OAuth Buildkite App to update commit statuses
      # IPs Subject to change - https://buildkite.com/docs/apis/rest-api/meta#get-meta-information
      allow 100.24.182.113;
      allow 35.172.45.249;
      allow 54.85.125.32;

      deny all;
    }

    location = /api/v3/user {
      proxy_pass https://ghe.internal:443;

      # Allow for OAuth Buildkite App
      # IPs Subject to change - https://buildkite.com/docs/apis/rest-api/meta#get-meta-information
      allow 100.24.182.113;
      allow 35.172.45.249;
      allow 54.85.125.32;

      deny all;
    }

    location = /api/v3/user/emails {
    proxy_pass https://ghe.internal:443;

    # Allow for OAuth Buildkite App
    # IPs Subject to change - https://buildkite.com/docs/apis/rest-api/meta#get-meta-information
    allow 100.24.182.113;
    allow 35.172.45.249;
    allow 54.85.125.32;

    deny all;
    }

    location /login/oauth {
      proxy_pass https://ghe.internal:443;

      # Allow for OAuth Buildkite App to authorize
      # IPs Subject to change - https://buildkite.com/docs/apis/rest-api/meta#get-meta-information
      allow 100.24.182.113;
      allow 35.172.45.249;
      allow 54.85.125.32;

      # Your own IPs
      allow ...;

      deny all;
    }

  }
}
Learn more about restricting access to your GitHub Enterprise Server on firewalled or proxy services in Restricting access to proxied TCP resources of the NGINX docs.
GitHub App
The GitHub App integration registers its app on GitHub Enterprise Server using a GitHub App manifest flow. The flow crosses two different network paths, and the routing matters when a proxy sits in front of GitHub Enterprise Server:
- App registration runs in your browser against your GitHub Enterprise Server URL directly, not through the Public API URL proxy. GitHub Enterprise Server binds the login session to its own canonical hostname. Routing this step through a proxy on a different hostname drops the session and the app is never created. Whoever sets up the integration needs browser access to the GitHub Enterprise Server URL.
- Buildkite's server-side calls go through the Public API URL proxy when you set one, and otherwise reach GitHub Enterprise Server directly. These calls convert the manifest into an app, install it, manage webhooks, and update commit statuses.
To restrict the server-side proxy, allow the Buildkite IP addresses from the Meta API endpoint and pass the requests through. If you also restrict by path, the GitHub App integration reaches these paths on GitHub Enterprise Server:
/api/v3/app-manifests/.*/conversions/api/v3/app/installations.*/api/v3/installation/repositories/api/v3/user/installations/api/v3/repos/.*/api/v3/search/repositories/api/v3/rate_limit/login/oauth/access_token
Allowing the broader /api/v3/ and /login/oauth/ prefixes is simpler and won't need revisiting if the set of endpoints changes. The following is an example NGINX server configuration for the server-side proxy. This configuration carries Buildkite's server-side calls only. Browser-driven app registration reaches GitHub Enterprise Server directly and is not proxied here:
daemon off;

events {
  worker_connections 1024;
}

http {

  server {
    listen 443 ssl;

    # App registration is browser-driven and reaches GitHub Enterprise Server
    # directly, so it is not proxied here. This proxy carries Buildkite's
    # server-side calls only.
    location / {
      deny all;
    }

    location /api/v3/ {
      proxy_pass https://ghe.internal:443;

      # IPs subject to change - https://buildkite.com/docs/apis/rest-api/meta#get-meta-information
      allow 100.24.182.113;
      allow 35.172.45.249;
      allow 54.85.125.32;

      deny all;
    }

    location = /login/oauth/access_token {
      proxy_pass https://ghe.internal:443;

      # IPs subject to change - https://buildkite.com/docs/apis/rest-api/meta#get-meta-information
      allow 100.24.182.113;
      allow 35.172.45.249;
      allow 54.85.125.32;

      deny all;
    }

  }
}
GitHub App provider with a Public API URL
When using the GitHub App provider for GitHub Enterprise Server with a Public API URL (reverse proxy) configured, the browser-driven App creation step uses your GHES URL (canonical hostname) directly, not the proxy:
- Browser setup step: Your browser connects to the canonical GHES URL to create the GitHub App. The person running setup must be able to reach and log in to GHES at this address.
- Server-side API traffic: Buildkite continues to use the Public API URL for server-side API calls, including exchanging the manifest code during setup and updating commit statuses after setup.
If the canonical GHES URL is not reachable from the browser during setup, App creation will fail with "We didn't find an App Manifest for your request." Ensure the person running setup has browser access to the canonical GHES URL to complete the initial connection step.
Multiple GitHub Enterprise integrations
You can set up multiple GitHub Enterprise integrations with your Buildkite organization. However, due to the OAuth installation requirements, each integration must be configured by a unique user. Each user must possess admin permissions in both Buildkite and GitHub.
Using one repository in multiple pipelines and organizations
If you want to use the same repository in multiple pipelines (including pipelines in different Buildkite organizations), you need to configure a separate webhook for each pipeline. Follow the webhook setup instructions in the Buildkite UI. Buildkite shows you these instructions when you create the pipeline, but you can also find them in Pipeline > your specific pipeline > Settings > your Git service provider > your Git service provider's Setup Instructions.
If you want to integrate the same repository into multiple Buildkite organizations, you need to link each organization to GitHub using different Buildkite user accounts. You must use different user accounts because there's a one-to-one relationship between a Buildkite user and a GitHub user. The user needs admin permissions on the GitHub organization to link it to Buildkite. You can only install the Buildkite app for GitHub once per GitHub organization.
Build skipping
You may not always want to rebuild on every commit, or branch. You can configure Buildkite to ignore individual commits or branches, or to skip builds under certain conditions.